What is a Bumper Repair Kit and How Does It Work?
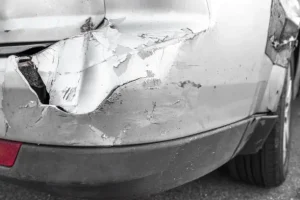
Bumpers take a lot of knocks. From minor scrapes to hairline cracks, they often bear the brunt of everyday driving mishaps. But before you resign yourself to costly professional repairs, consider the empowering world of bumper repair kits! These handy toolkits put the power of DIY bumper rehabilitation into your hands, letting you tackle those nicks and dings with surprising ease.
So, what exactly is a bumper repair kit? It’s like a first-aid kit for your car’s exterior. Typically, it comes packed with everything you need to fix most minor bumper damage, including:
- Filler: This putty-like substance fills in gaps, cracks, and gouges, restoring the smooth, original contour of your bumper.
- Sandpaper: Different grits allow you to roughen the repair area for better adhesion and smooth out the filled surface for a seamless finish.
- Adhesive: For deeper cracks or tears, some kits include an adhesive to bind the broken pieces together before filling.
- Spreader and applicator tools: These handy helpers make applying the filler and adhesive a breeze.
- Instructions: Step-by-step guidance makes the process approachable even for DIY novices.
The repair process of bumper repair by kit
- Clean and prepare the area: Wash the damaged area thoroughly and dry it completely. Sanding around the crack or gouge creates a rough surface for better adhesion.
- Apply adhesive (if needed): For significant cracks or tears, use the included adhesive to bind the broken pieces together. Allow it to dry according to the instructions.
- Fill the gaps: Apply the filler using the spreader or applicator tool, ensuring it fills the gaps and contours smoothly. Avoid overfilling, as excess material will need sanding later.
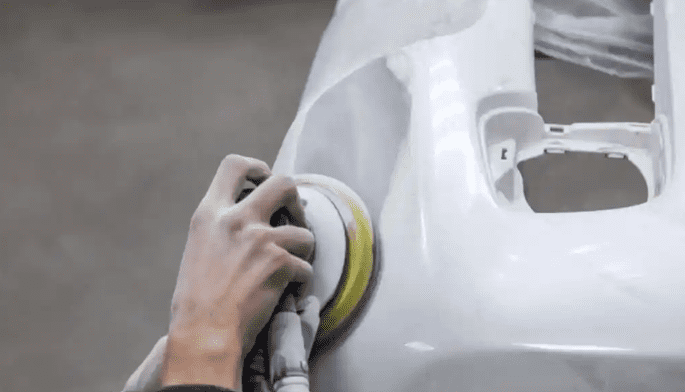
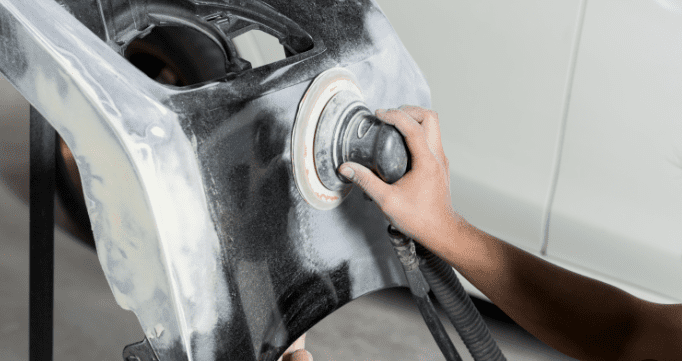
- Smoothing and shaping: Once the filler dries, use the sandpaper to smooth out the repaired area until it seamlessly blends with the surrounding bumper.
- Prime and paint (optional): For a flawless finish, apply a primer over the repaired area and then match the paint to your car’s original color.
Remember: While bumper repair kits are amazing for minor damage, they might not be suitable for major cracks, punctures, or deep gouges. In such cases, consulting a professional body shop is recommended.
Benefits of using a bumper repair kit:
- Cost-effective: Save a significant amount compared to professional repairs.
- Convenient: Repair damage at your own pace and schedule.
- Empowering: Learn a new skill and take pride in fixing your car yourself.
- Improved car value: A repaired bumper makes your car look more presentable and potentially increases its resale value.
How to Choose the Right Bumper Repair Kit for Your Vehicle?
Here are some possible steps that you can use or modify:
1: Identify the type, size, and material of your bumper and the extent and location of the damage.
2: Check the reviews and ratings of the different bumper repair kits available on the market, and compare their features, prices, and benefits.
3: Select a bumper repair kit that is compatible and quality with your bumper, and that contains all the essential tools and materials you need, such as epoxy, filler, mesh, spreader, sandpaper, and solvent wipes.
4: Read the instructions carefully and follow them step by step to avoid any mistakes or complications.
How to Use a Bumper Repair Kit to Fix Scratches, Scuffs, and Cracks?
Bumpers are the unsung heroes of the car world, taking on dings, scrapes, and the occasional rogue shopping cart without complaint. But even the most resilient bumper can eventually show signs of wear and tear. Before you resign yourself to costly professional repairs, consider the magic of bumper repair kits! These DIY toolkits empower you to tackle those unsightly scratches, scuffs, and cracks with surprising ease.
What you’ll need:
- Bumper repair kit: Choose one suitable for the type and severity of the damage. Most kits contain filler, sandpaper, adhesive (for cracks), applicator tools, and instructions.
- Masking tape and newspaper: To protect surrounding areas during sanding and painting.
- Cleaning supplies: Soap, water, and degreaser.
- Optional: Primer and matching car paint for a professional finish.
Step-by-step guide:
Clean and prepare the area: Wash the damaged area thoroughly with soap and water, then degrease it to ensure good adhesion.
Mask and protect: Cover surrounding areas with masking tape and newspaper to prevent overspray and accidental sanding.
Address cracks (if present): Apply the included adhesive to bind the broken pieces together following the kit’s instructions. Allow it to dry completely.
Fill the gaps: Apply the filler using the spreader or applicator tool, ensuring it fills scratches, scuffs, and gouges smoothly. Don’t overfill, as excess material will need sanding later.
Smoothing and shaping: Once the filler dries, use the included sandpaper (starting with coarse grit and progressing to finer grits) to smooth out the repaired area until it seamlessly blends with the surrounding bumper.
Prime and paint (optional): For a flawless finish, apply a primer specifically designed for plastic bumpers. Then, use matching car paint to camouflage the repair and restore the original color. Allow each coat to dry completely before applying the next.
Remove masking and admire your handiwork!
Tips for success:
- Work in a well-ventilated area.
- Wear gloves and safety glasses for protection.
- Follow the kit’s instructions carefully, especially regarding drying times.
- Apply thin, even coats of filler and paint.
- Don’t be afraid to practice on a scrap piece of plastic before tackling the actual bumper.
how i can choose a bumper repair kit in Houston tx
What is the best way to repair a plastic bumper?
The best way to repair a plastic bumper depends on the type and extent of the damage but generally involves the following steps
- Clean the bumper and remove any dirt, grease, or debris.
- Sand the scratched or cracked area with coarse and fine sandpaper to smooth out the surface and create a rough texture for the filler to adhere to.
- Apply a plastic filler or epoxy to the damaged area using a spreader or a mesh, and let it dry and harden.
- Sand the filler or epoxy with fine sandpaper to remove any excess material and blend it with the bumper.
- Spray primer over the repaired area and let it dry.
- Spray paint over the primer using a matching color and let it dry.
- Spray a clear coat over the paint to protect it and give it a glossy finish.
What is a bumper repair kit?
A bumper repair kit is a set of tools, materials, and instructions designed to facilitate the repair of minor damages or scratches on a vehicle’s bumper. It typically includes items like adhesives, fillers, sandpaper, and paint to help restore the bumper’s appearance and functionality.